Xhorseキープログラミングツール

Xhorseキープログラミングツールのソフトウェアとハードウェアサービス

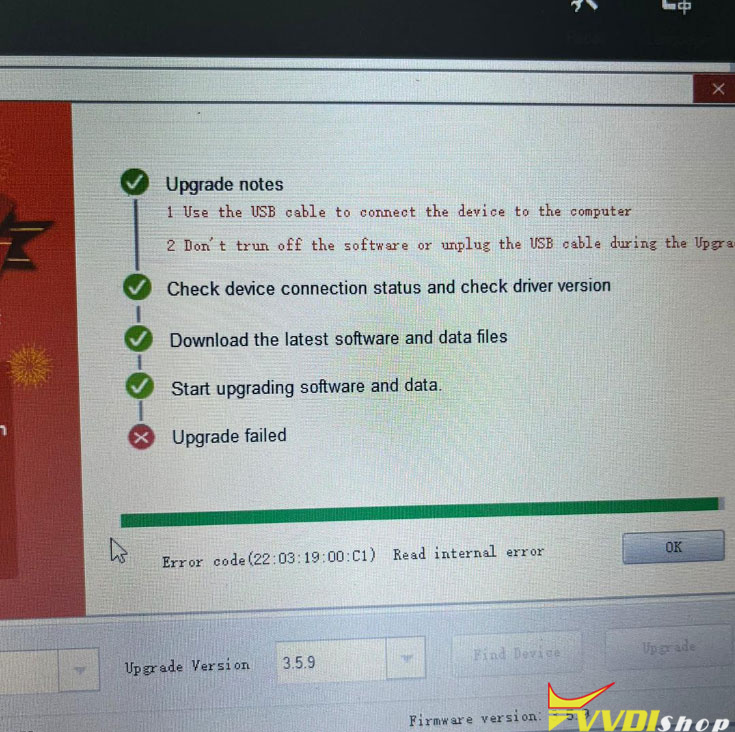
 The tips here could help people who get an “error code 2, not detect probe” problem when decoding Renault emergency keys with Xhorse Dolphin XP005/XP005L key cutting machine.

Xhorse Dolphin Renault Emergency Keys Decode Error 2 Solution 1

Xhorse Dolphin Renault Emergency Keys Decode Error 2 Solution 2

Xhorse Dolphin Renault Emergency Keys Decode Error 2 Solution 3

Xhorse Dolphin Renault Emergency Keys Decode Error 2 Solution 4
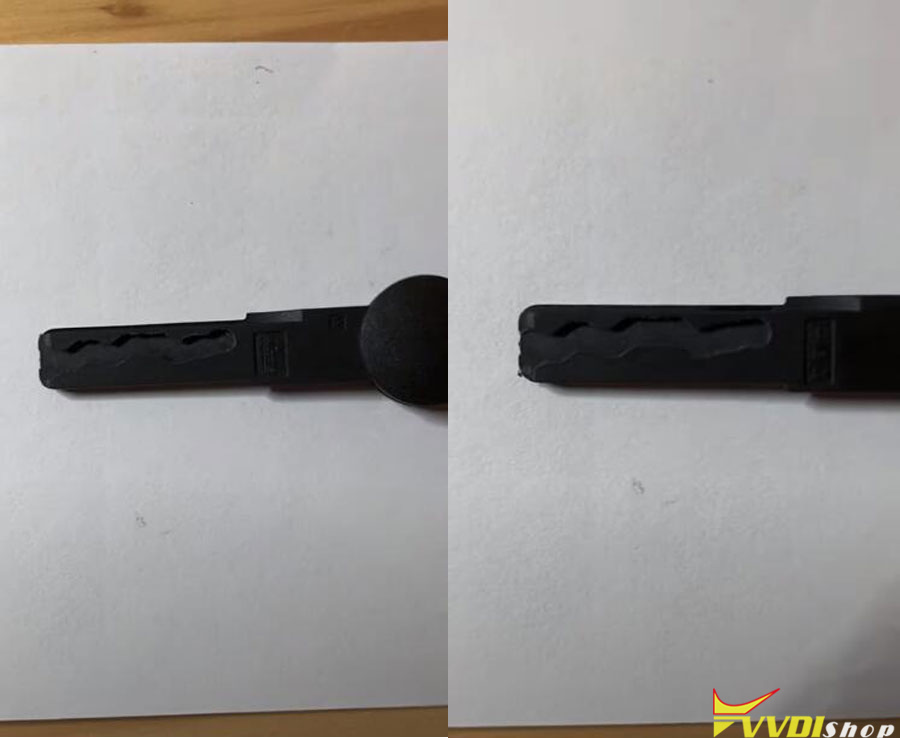
Apparently, to make Renault emergency keys you need a wedge to be able to decode the key (if anyone has already had this problem and has a solution)
Users succeeded but have to cheat by lifting the key to be able to decode.  block the key after having raised it slightly and after several tries, it decodes ok. The engraving is done normally if you choose cut by bitting.   You are able to cut with the cut by bitting function in 1 minute.

1 Go to the cars
2 go to make
3 go to model
4 go to year (which blade,its different ones. if you have the key will see which one to choose.
4.1 follow the lanes if the machine show you
5 press decode
6 put the new blade

7.press cut

www.vvdishop.com

 It’s a 2010 Volkswagen Passat cc all key lost.  id48 315mhz.


First you read CCM was used CG Pro programmer
Get CS PIN from vvdi2 vag via dump
Then prepare key with key tool plus

After reading 95320 data with cgprog and saving the file, get a cs pin code from vvdi2 as a dump file, create a dealer key with vvdi key tool plus and register the key, run remote control.

You can also make an XT27 on used position and just start the car no need any operation on OBD just learn the remote.
VVDI2 Program 2010 VW Passat CC All Keys Lost 1

VVDI2 Program 2010 VW Passat CC All Keys Lost 2

VVDI2 Program 2010 VW Passat CC All Keys Lost 3

VVDI2 Program 2010 VW Passat CC All Keys Lost 4

VVDI2 Program 2010 VW Passat CC All Keys Lost 5

VVDI2 Program 2010 VW Passat CC All Keys Lost 6

VVDI2 Program 2010 VW Passat CC All Keys Lost 7

VVDI2 Program 2010 VW Passat CC All Keys Lost 8

VVDI2 Program 2010 VW Passat CC All Keys Lost 9


 We are looking at a 2018 Ford Mustang.   The situation was a locksmith came out here and somehow managed to clear all the keys out and then they couldn’t add keys back in had an active alarm situation.


My first time actually trying the Xhorse ford mustang alarm active bypass cable but it worked like a charm.

What i had to do is unhook the positive lead connect this orange piece to the positive. Connect read to the battery.  Now the battery was low so then i also has to put a jumper box on the positive lead and then just to the negative terminal to ground it out to get enough juice to program the keys.

Then just simply plug the cable into your OBD connector and then into your OBD2 port.

The cable definitely not work with mini obd tool.  The programmer has to have its own power. And the mini OBD requires power from the car.

You also have to latch the door so the car thinks the doors are closed. It says just to close driver door but i had to open the passenger door as well because the cable was not long enough to reach the battery because it’s on the passenger side of the car so i pushed both latches in on both sides.

So the car thought both doors were closed. I went through a little 10-minute process and it programmed the keys right in one try.

Also i’ll throw a connection diagram, just so you can see the connections but the vvdi key tool plus also has a pretty good picture.

I did the 2018 Mustang with an active alarm so i am actually pretty impressed with it.


Connection images are attached below:

Xhorse Ford AKL Cable Bypass Mustang 2018 Active Alarm 1

Xhorse Ford AKL Cable Bypass Mustang 2018 Active Alarm 2

Xhorse Ford AKL Cable Bypass Mustang 2018 Active Alarm 3

Xhorse Ford AKL Cable Bypass Mustang 2018 Active Alarm 4

Xhorse Ford AKL Cable Bypass Mustang 2018 Active Alarm 5

Xhorse Ford AKL Cable Bypass Mustang 2018 Active Alarm 6


http://blog.vvdishop.com/xhorse-ford-akl-cable-review-on-mustang-2018/

 Xhorse vvdi key tool plus adds Toyota 4A, 4D and 8A smart key add key and all keys lost function.


Non-Smart Key

• 4D/4D+:  Support clone, add key via OBD, all key lost via OBD

– 8A:  Support clone, add key via OBD, all key lost (non-smart key adapter needed)

Smart Key

• 4D/4D+: Support add key via OBD, all key lost via OBD

– 8A(88):  Support add key via OBD, all key lost (disassembling to read EEPROM)

– 8A(A8) : Support add key via OBD, all key lost (smart key adapter needed for some models)

– 8A(A9): Support add key via OBD, all key lost (smart key adapter needed)

– 8A(AA) : Support add key via OBD (smart key adapter needed or password calculation), all key lost via OBD (smart key adapter needed)


• 4A: Support add key via OBD (smart key adapter needed or password calculation), all key lost via OBD (smart key adapter needed)

* Continuous upgrades offered and more models coming soon.

Xhorse Key Tool Plus Toyota 4D 8A 4A Smart Key List


http://blog.vvdishop.com/connect-xhorse-xd8askgl-toyota-8a-akl-adapter/

http://blog.vvdishop.com/xhorse-vvdi-8a-adapter-program-2020-toyota-highlander-all-keys-lost/

 Xhorse Tech rolls out new VVDI MB BE Key pro V3.2 with yellow board in 2022. What’s the difference between new BE key and the old one with green board?

vvdi be key pro yellow board

ItemVVDI BE Key Yellow BoardVVDI BE Key Green Board
Image 
vvdi be key yellow board

 
vvdi be key yellow board

VersionV3.2V1.5
Frequency315Mhz/433MHz315Mhz/433MHz
Points without 200 points with 200 points (can be exchanged to 1 MB Token)
Compatible devicesMultiple MB programmers, VVDI MB, Key Tool Plus, Autel etcMultiple MB programmers, VVDI MB, Key Tool Plus, Autel etc
ReusableYesYes
Applicable chip models705 Moto(1997-2000) NEC(2001-2005) NEC(2006-2010) BGA(after 2011)705 Moto(1997-2000) NEC(2001-2005) NEC(2006-2010) BGA(after 2011)

They have the same coverage and use the same key shell. The yellow board is cheaper because it does not contain 200 points. 


Both BE keys frequency can be exchanged manually or by vvdi mb/key tool plus software.

Method 1.Remove PCB FRE resistor change to 433MHZ.

Method 2.Change Via VVDI MB Tool/Key Tool Plus Software.You can use VVDI MB software check key frequency firstly in EIS Software,other function set frequency.Then it shows 315mhz when you read frequency.Choose 433mhz to set,and check frequency again.

How to Change Benz VVDI BE Key Pro Frequency?


 How to add a key when Skoda octavia 1Z all keys lost or at least accessing immo data.  For newer VAG NEC Clusters by Pogo pin ground cable with xhorse vvdi2 vag key programmer.


Skoda octavia 1Z AKL by Vvdi2 (Pogo Pin Method)


Main steps:

Step 1: Read Immo data

Step 2: Make dealer key

Step 3: Learn key


Procedure:

Step 1: Read immo data

Before read immo data, set up pogo pin connection

Use this pogo pins all keys lost

http://blog.vvdishop.com/pogo-pins-all-keys-lost-for-pin-cs-with-vvdi2/

Skoda Octavia NEC24C64 AKL with Xhorse VVDI2 pogo pin 1

Skoda Octavia NEC24C64 AKL with Xhorse VVDI2 pogo pin 2

Skoda Octavia NEC24C64 AKL with Xhorse VVDI2 pogo pin 3

Skoda Octavia NEC24C64 AKL with Xhorse VVDI2 pogo pin 4

Input transponder key into vvdi2
Run vvdi2 software, go to Transponder Programmer
Detect transponder type Megamos 48- Unlock
Turn on ignition switch
Go to VVDI2 VAG, Key Learn->4th Immobilizer system-VW/Skoda/Seat-> Instrument Cluster NEC24C64
Read EEPROM and Login method 2
Save eeprom file

Skoda Octavia NEC24C64 AKL with Xhorse VVDI2 pogo pin 5

Skoda Octavia NEC24C64 AKL with Xhorse VVDI2 pogo pin 6

Skoda Octavia NEC24C64 AKL with Xhorse VVDI2 pogo pin 7

Skoda Octavia NEC24C64 AKL with Xhorse VVDI2 pogo pin 8

Skoda Octavia NEC24C64 AKL with Xhorse VVDI2 pogo pin 9

Step 2: Make dealer key 

Press Make Dealer Key and select login method 2
Program normal dealer key
Make dealer key success


Skoda Octavia NEC24C64 AKL with Xhorse VVDI2 pogo pin 10

Skoda Octavia NEC24C64 AKL with Xhorse VVDI2 pogo pin 11

Step 3: Learn key 

Insert new key into ignition switch
Turn on ignition
Select Add key
You should backup eeprom and immo data before learn key
Select Learn key, load immo data
if vvdi2 ask is car has keyless, press No
Insert the dealer key imto car and switch on for at least 2 seconds
all keys learn successfully
Reset instrument

Skoda Octavia NEC24C64 AKL with Xhorse VVDI2 pogo pin 12

Skoda Octavia NEC24C64 AKL with Xhorse VVDI2 pogo pin 13

Skoda Octavia NEC24C64 AKL with Xhorse VVDI2 pogo pin 14

Skoda Octavia NEC24C64 AKL with Xhorse VVDI2 pogo pin 15

Skoda Octavia NEC24C64 AKL with Xhorse VVDI2 pogo pin 16

Skoda Octavia NEC24C64 AKL with Xhorse VVDI2 pogo pin 17

Skoda Octavia NEC24C64 AKL with Xhorse VVDI2 pogo pin 18

Install instrument cluster back to the vehicle and test the new key.

Done.

Technical support from www.vvdishop.com

http://blog.vvdishop.com/skoda-octavia-1z-all-keys-lost-with-xhorse-vvdi2/

 What is a Pogo Pin Cable?

The pogo pin is part of the SVG cable and you can find the right position on google.  You must connect the pogo pin to right position on the dashboard.   If you place the pogo pin in the right position you can get the valid data file. With this datafile you can unlock the dashboard at any time without a working key.

When the pin is connected, turn the power supply ON and press the OK button.

Applicable to: Dashbards VDO UDS or Micronas 2009—2012


How Make POGO Pin Cable To Read NEC Cluster PIN & CS With VVDI2?

You can use Xhorse VVDI2 key programmer with super vag cable and the supervag manual.

It works great to get pin and CS with cable supervag svg157 cable with POGO pin is just a GND wire nothing special. 2min to make itself.

You can make your own cable for NEC cluster with “POGO pin” and all is working

wiring diagram for bukse from nec dash and OBD2, to make your cable

POGO pin cable is a just GND cable you connect to RESET PIN on PCB (tested on NEC 24C64 cluster, no have currently any Micronas cluster, however micronas read EPP is easy, no need remove dials etc)

Make Pogo Pins VW AKL for VVDI2 1

Make Pogo Pins VW AKL for VVDI2 2

Make Pogo Pins VW AKL for VVDI2 3

with that example is easy to find on most of NEC cluster where is that
compare with renesas V850 datasheet you will understand what is this and where is available


you can also find epp connection near NEC, and read EPP via BDM points
anyway, more practice will make you more professional.


You can also get more pogo pins all keys lost here

http://blog.vvdishop.com/pogo-pins-all-keys-lost-for-pin-cs-with-vvdi2/


 Audi A3 2009 P8 ECU EDC17 and dash VDO 8P0920932G with white display. All keys have lost. I cannot read dash via obd. I take out and read the eeprom 24c32 and need modified this for enter in service mode and read immo data.

Updated:

avdi work in this car, and xhorse vvdi2 perfect.

Finally, i found the option service mode in vvdi2, i have FVDI too. My 1st option, i tried did all the process in bench because car not start and client give me only dash, this dash need gateway for wake up. With car,  Read abs confing. take out dash and modified eeprom for service mode, reinstall in car, restore ori eeprom via obd read and precode new key in 5 min. Job done.


Read aslo:

http://blog.vvdishop.com/tips-to-add-key-2008-audi-a8-with-xhorse-vvdi2/

 Question: How do I copy HU66 B6 Plastic original and plastic new. I have only Xhorse Dolphin XP005. I don’t want to break the copier when I read the original key.

Answer: Super easy to decode by eye. Decode by eye or use a calliper to make the measurements.
Decode by eye input number put the metal blade in and wen its about to cut pause and swap metal blade out then put plastic blade in and continue.
There is an option for plastic key on the xhorse app.
Tick Plastic Key option
Cut HU66 Plastic Key with Xhorse Dolphin XP005 1

or get the xhorse key reader and it is excellent on wore out keys to decode.

Xhorse Dolphin XP-005/XP005L cutting plastic key HU66 instruction:
Example: cutting of a Skoda plastic key with a 2.5 mm milling cutter
In Xhorse app, go to Vehicle database- Skoda- Fabia- HU66
Align M2 clamp
Place side A of the plastic key
input bitting
press Cutting key
tick Plastic key/Aluminum key cutting
Cut HU66 Plastic Key with Xhorse Dolphin XP005 2

Cut HU66 Plastic Key with Xhorse Dolphin XP005 3

Cut HU66 Plastic Key with Xhorse Dolphin XP005 4
Cutting key in the process
Cut HU66 Plastic Key with Xhorse Dolphin XP005 5

Cut side A success.
Align M2 clamp
Place side A of the plastic key
input bitting
press Cutting key
tick Plastic key/Aluminum key cutting
Cut HU66 Plastic Key with Xhorse Dolphin XP005 6

Cut HU66 Plastic Key with Xhorse Dolphin XP005 7

Cutting key completed.
Cut HU66 Plastic Key with Xhorse Dolphin XP005 8
Test the new key.
Technical support from www.vvdishop.com
< 2022年07>
S M T W T F S
          1 2
3 4 5 6 7 8 9
10 11 12 13 14 15 16
17 18 19 20 21 22 23
24 25 26 27 28 29 30
31            
カテゴリ
QRコード
QRCODE

アクセスカウンタ
読者登録
メールアドレスを入力して登録する事で、このブログの新着エントリーをメールでお届けいたします。解除は→こちら
現在の読者数 0人
プロフィール
jtac
jtac