Xhorseキープログラミングツール

Xhorseキープログラミングツールのソフトウェアとハードウェアサービス

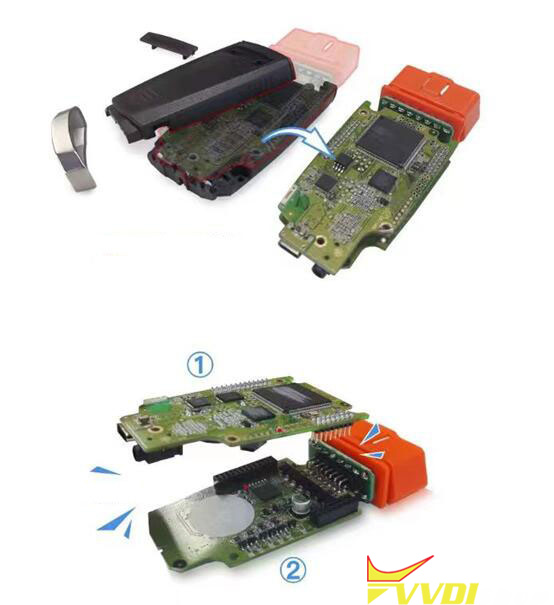
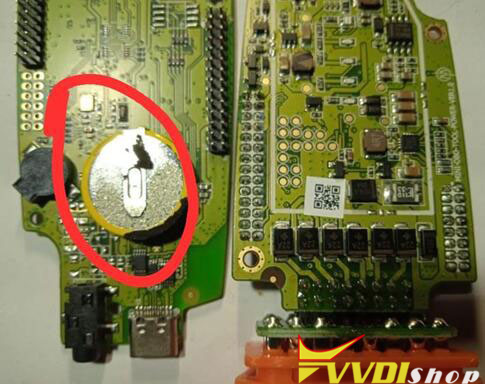
 Today I’m gonna use Xhorse Multi-Prog Programmer to read Opel AcDelco E87 emulated eeprom for a test. Includes how to read, extract, import the emulated eeprom and do mileage adjustment.

Xhorse Multi Prog Read Opel AcDelco E87 ECM 1

Xhorse Multi Prog Read Opel AcDelco E87 ECM 2

Connect device& ECU according to wiring diagram on bench.

Open Multi-Prog software,

  • Read Emulated EEPROM

Read >> Yes, read emulated EEPROM

Reading data, please wait…

Data read successfully.

Save emulated eeprom to file? Yes

The operation was successful.

Extracted and saved the emulated eeprom.

Load emulated eeprom? Yes, selected the saved flash file.

Now we can get the PIN code & mileage.

Mileage is 121408.2976km

Xhorse Multi Prog Read Opel AcDelco E87 ECM 3

Xhorse Multi Prog Read Opel AcDelco E87 ECM 4

Xhorse Multi Prog Read Opel AcDelco E87 ECM 5

  • Mileage Correction

We can also modify its mileage:

KM >> Enter new value: 40000

The mileage has been changed to 400000km.

Xhorse Multi Prog Read Opel AcDelco E87 ECM 6

  • Extract EEPROM

Click “EE-OUT”.

Extracts emulated eeprom from Flash.

Load INT-FLASH file? Yes, selected the original flash file.

The operation was successful.

Extracted and saved the emulated eeprom file.

Load emulated eeprom? Yes, selected the emulated eeprom file.

Xhorse Multi Prog Read Opel AcDelco E87 ECM 7

Xhorse Multi Prog Read Opel AcDelco E87 ECM 8

Xhorse Multi Prog Read Opel AcDelco E87 ECM 9

Xhorse Multi Prog Read Opel AcDelco E87 ECM 10

  • Import EEPROM

Click “EE-IN”.

Imports emulated eeprom to Flash.

Load the emulated eeprom? Yes, selected the emulated eeprom file.

The operation was successful.

Save the modified file? Yes

The operation was successful.

Load new FLASH? Yes, selected the new emulated eeprom file.

Xhorse Multi Prog Read Opel AcDelco E87 ECM 11

Xhorse Multi Prog Read Opel AcDelco E87 ECM 12

Xhorse Multi Prog Read Opel AcDelco E87 ECM 13

Xhorse Multi Prog Read Opel AcDelco E87 ECM 14

 www.vvdishop.com

 Some users reported that they have problems updating vvdi mini obd tool firmware and sync device.

Replace VVDI Mini OBD Tool Battery if Failed to Update Firmware 1

Replace VVDI Mini OBD Tool Battery if Failed to Update Firmware 2

Replace VVDI Mini OBD Tool Battery if Failed to Update Firmware 3

If the version is lower than 1.5.0, try several times, change PC or network, if all failed, device information is missing. Need to send back for repair.

If the version is 2.1.50, disassemble the device, replace a new battery, update firmware and sync device again.

Sync device again after replacing battery. Then update firmware via Upgrade kit again.

Follow steps below to replace battery.

Replace VVDI Mini OBD Tool Battery if Failed to Update Firmware 4

Replace VVDI Mini OBD Tool Battery if Failed to Update Firmware 5

Replace VVDI Mini OBD Tool Battery if Failed to Update Firmware 6

 One of our customers reported that his Xhorse Dolphin XP008 manual key cutting machine sounds weird when duplicating key.


Here is the possible solution from Xhorse engineer.

1.Unscrew these two screws and take off the belt.

Xhorse Dolphin XP008 Makes Weird Sound Solution 1

2. Unscrew 5 screws on the shell

Xhorse Dolphin XP008 Makes Weird Sound Solution 2

3. Unscrew the top screw in this hole.

Xhorse Dolphin XP008 Makes Weird Sound Solution 3

4. Unscrew the cutter head and you can take out the bearing

Xhorse Dolphin XP008 Makes Weird Sound Solution 4

5. You can apply some glue on these two bearings, it must be a thin layer.

Xhorse Dolphin XP008 Makes Weird Sound Solution 5

Install machine again, then try to cut key.

www.vvdishop.com

 Problem:

Xhorse Multi Prog failed to read Mercedes EZS W169. Software gives an error: “Chip crack failed. Error code 13050102, cracking failed. adjust the VDD voltage to 4-5V.
“. Any idea?

Xhorse Multi Prog MB EZS Chip Crack Failed 1

Xhorse Multi Prog MB EZS Chip Crack Failed 2

Solution:

If you don’t use lab power supply and don’t adjust the volts well you will get error. It’s not a MultiProg failure.

You have to manually modify the voltage in the software because it is at 2.7 vdd but 5v it will work.
Set it to 13.2v max amperage and set the EZS voltage to 4.9v.

Xhorse Multi Prog MB EZS Chip Crack Failed 3

www.vvdishop.com

 Entry question:

Looking to buy my first horse key cutting machine mainly for auto and household key duplication. Should I go for the Dolphin XP005L or the Condor II? Any recommendations?


They have the same car key database.

As for household key cutting, xhorse dolphin I and dolphin II will not cut house key by bitting. You need to write the bitting yourself.

Dolphin will duplicate only.

Dolphin will cut household keys via Universal Key Duplication only if you have a working key.

Condor Xc mini plus 2 will cut them by code. It is the only xhorse machine has the option to cut house keys by code.

The Condor II machine allows you to use custom bitting directly on the machine. You also need the M4 clamp. Once you learn to create and use custom bitting, the machine will cut extremely accurately, usually within a thousandth of an inch.

Xhorse Condor II or Dolphin II for Household Keys 1

What household keys does it in the database?

It has a lot of key types in the 100s for house keys.
Kwikset KW1, KW10, Schlage SC1, SC4, & Y1 etc.

You can check household key types in the menu.

Xhorse Condor II or Dolphin II for Household Keys 2

Xhorse Condor II or Dolphin II for Household Keys 3

Xhorse Condor II or Dolphin II for Household Keys 4

Generally, Dolphin is a better option for van. If you want to go with Condor you can buy a battery/converter kit that comes with 12v van and wall outlet.

I like my condor mini plus ii with the battery conversion. I charge it from the 12v outlet and it lasts for 20-30 keys depending. I also have the battery powered condor duplicator that also charges from the 12v car port. The Condor ii works great, the cover protects from flying debris, and it is controllable using the screen or key tool max or cellphone app.

 How to: correct odometer on VAG NEC+24C64 2014.06- dashboard using the Xhorse iScancar VAG MM-007 service tool.


Model example: VW Tiguan 20TSI 4motion DSG7 swap cluster

Xhorse VAG MM-007 Change VW Tiguan 2014- NEC24C64 Mileage 1

Record original mileage: 114, 625km
Select Special Function from main menu
Then KM calibration-> Dashboard
Select instrument type: NEC+24C64 (2014.06- VW/Skoda/Seat)
Press OK to continue

Xhorse VAG MM-007 Change VW Tiguan 2014- NEC24C64 Mileage 2

Xhorse VAG MM-007 Change VW Tiguan 2014- NEC24C64 Mileage 3

Xhorse VAG MM-007 Change VW Tiguan 2014- NEC24C64 Mileage 4

Xhorse VAG MM-007 Change VW Tiguan 2014- NEC24C64 Mileage 5

Xhorse VAG MM-007 reads old KM, check and confirm
Then input the new KM

Xhorse VAG MM-007 Change VW Tiguan 2014- NEC24C64 Mileage 6

Choose login method: 1 (only 1 or 2)

Xhorse VAG MM-007 Change VW Tiguan 2014- NEC24C64 Mileage 7
The dashboard will turn black during the writing km procedure. It is normal.

Xhorse VAG MM-007 Change VW Tiguan 2014- NEC24C64 Mileage 8
Dash will be reset after writing new KM successfully.

Xhorse VAG MM-007 Change VW Tiguan 2014- NEC24C64 Mileage 9

Check the new mileage.

It corrects mileage successfully.

www.vvdishop.com

 How-to: program Volvo FH12 truck (NM93C66) all keys lost with Xhorse VVDI Prog and Tango key programmer.

Xhorse VVDI Prog Read Volvo FH12 93C66 1

1.Read Immo data

Remove chip 93C66

Solder to vvdi prog programmer

Xhorse VVDI Prog Read Volvo FH12 93C66 2
Xhorse VVDI Prog Read Volvo FH12 93C66 3
Xhorse VVDI Prog Read Volvo FH12 93C66 4
Xhorse VVDI Prog Read Volvo FH12 93C66 5

Read and save 93C66 eeprom.

Xhorse VVDI Prog Read Volvo FH12 93C66 6

Xhorse VVDI Prog Read Volvo FH12 93C66 7

2. Write key with Tango

In Tango software, select Volvo->Trucks-> FH12 93C66

Xhorse VVDI Prog Read Volvo FH12 93C66 8

Upload eeprom read by vvdiprog

Select an key position and write key.

Xhorse VVDI Prog Read Volvo FH12 93C66 9

Install eeprom chip back to immo box.

3. Cut key by xhorse condor key cutting machine.

Xhorse VVDI Prog Read Volvo FH12 93C66 10

 This is a tutorial on how to cut a HON66 key with Xhorse Condor XC-002 PRO. Always remember the key cutting machine was well-calibrated(Height Level Adjustment) before working.


Height Level Adjustment

Method 1.

  • Insert the original key with the help of a guiding block. Use a shim to make sure the key is well aligned.
  • Insert the key blank to the right for ready.
  • Press down the main handle and check the indicator light. Follow the direction of the light and rotate the micro-adjust knob until the middle light turns green.

Xhorse Condor XC-002 Pro Cut HON66 Key 1

Xhorse Condor XC-002 Pro Cut HON66 Key 2

Xhorse Condor XC-002 Pro Cut HON66 Key 3

Xhorse Condor XC-002 Pro Cut HON66 Key 4

Xhorse Condor XC-002 Pro Cut HON66 Key 5

Xhorse Condor XC-002 Pro Cut HON66 Key 6

Method 2.

If you don’t have a shim momentarily, follow the method as below.

  • We can also use probes of the same specification on both sides to ensure the accuracy.
  • Press down the main handle and rotate the handle to lock it. Utilize the probe and cutter of Condor XC-002 PRO machine for key alignment.
  • Replace the cutter back and adjust the micro-adjust knob until the middle light turns green.


Height level adjustment was finished.


Xhorse Condor XC-002 Pro Cut HON66 Key 7

Preparation

Before cutting, take a look at the clamp. There are 3 marked positions at the bottom of the clamp: A, B and C.

  1. Slide in the clamp and make one triangle directs to the line depending on your need.
  2. Turn on the power switch of the cutter, adjust the speed control knob to a suitable speed.

Xhorse Condor XC-002 Pro Cut HON66 Key 8

Cut HON66 Key

Now let’s start duplicating the key.

  1. Press down the main handle and start cutting the first side.
  2. After finishing, turn off the power switch. Clean up the clamp and flip the key.
  3. Similarly align the key and finish calibration of the other side.
  4. Turn on switch to cut the other side of key.


*Please remember to turn off the power when completed.


Now the new HON66 key cutting has been finished.

Xhorse Condor XC-002 Pro Cut HON66 Key 9

Xhorse Condor XC-002 Pro Cut HON66 Key 10

www.vvdishop.com

 Need to add a smart key for a TOYOTA Prius Plus 2018 rest left hand drive.

Board number 89904-12370.

Program Toyota Prius Plus 2018 Key using Xhorse XM38 1

Original key

Program Toyota Prius Plus 2018 Key using Xhorse XM38 2
Program Toyota Prius Plus 2018 Key using Xhorse XM38 3

Key board


To use the Xhorse XM38 Toyota smart key we need to know what chip and transmitter frequencies the original key had.


This is TOYOTA, everything should be much simpler.
After reading the key, everything began to become clearer, and it no longer seemed so scary.

Program Toyota Prius Plus 2018 Key using Xhorse XM38 4

It is chip 8A, page 88.

Program Toyota Prius Plus 2018 Key using Xhorse XM38 5

radio transmitter templates. dual frequency

Choose template 0020 dual frequency. It’s just that these templates have different Page settings, somewhere 88, somewhere A8 or A9.
I write the option into the key. Then program the XM38 smart key to car.

Program Toyota Prius Plus 2018 Key using Xhorse XM38 6

Now a Prius with a key like a Camry.


In fact, it turns out that this key is not so unique. This is the same key as on the Camry 50/55 with only one difference, the Camry has a trunk release button, the Prius doesn’t have it, so the board number is different. A good alternative is the universal key from Xhorse xm38, you just need to configure it.

www.vvdishop.com

< 2024年06>
S M T W T F S
            1
2 3 4 5 6 7 8
9 10 11 12 13 14 15
16 17 18 19 20 21 22
23 24 25 26 27 28 29
30            
カテゴリ
QRコード
QRCODE

アクセスカウンタ
読者登録
メールアドレスを入力して登録する事で、このブログの新着エントリーをメールでお届けいたします。解除は→こちら
現在の読者数 0人
プロフィール
jtac
jtac