Xhorseキープログラミングツール

Xhorseキープログラミングツールのソフトウェアとハードウェアサービス

 Xhorse VVDI BIMTool Pro can change CAS1, CAS2, CAS3, CAS3+, CAS4 (0L15Y), CAS4 (5M48H) KM (mileage) via dump file.


How to Change BMW CAS1-CAS4 KM with VVDI BIMTool Pro?


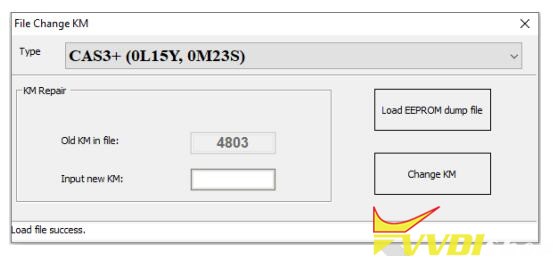
Change KM for EWS/CAS: Load EEPROM dump, input new KM value, press button Change KM and save new EEPROM dump then write back it to EEPROM.

VVDI BIMTool Pro Change BMW CAS1-CAS4 KM

CAS1/CAS2/CAS3/CAS3+ change KM steps:

1) Record the KM information displayed in instrument, take instrument away from car avoid synchronize KM with CAS automatically

2) Set CAS KM to 0 (you can do this via OBD or EEPROM dump, select correct CAS version)

3) Read instrument EEPROM dump by programmer then save EEPROM dump you read, usually it use M35080 chip

4) Select File Change KM ->M35080 (Instrument) and load EEPROM dump saved in step 3 Attention: this type instrument have 2 algorithm for KM, Algorithm 1 and Algorithm 2, you need try different algorithm to check the Old KM in file value, which one is nearby the KM (write in step 1)), which is the right type. Change new KM with the right type

5) Input new KM

6) Press button “Change KM” and save new EEPROM dump

7) Write new EEPROM dump to M35080 chip

8) Put your instrument in car

9) Finished


F-Series(CAS4 system) change KM steps:

1) Record the KM information displayed in instrument, take instrument away from car avoid synchronize KM with CAS automatically

2) Set CAS KM to 0km (Change KM with File Change KM, select type accord chip mask, support 1L15Ymask and 5M48H mask)

3) Read instrument EEPROM dump by programmer

4) Select File Change KM ->F-Series Instrument and load EEPROM dump which saved in step 3)

5) Input new KM 6) Press button “Change KM” and save new EEPROM dump

7) Write new EEPROM dump to instrument

8) Put your instrument in car

9) Finished
www.vvdishop.com

 If failed to downgrade BMW CAS3++(istap) with Xhorse VVDI BIMTool Pro and data corrupted after programming key via OBD. BIMTool has a option to repair BMW CAS3++.


OBDII-CAS3+ ISTAP Repair

For suddenly condition cause CAS enter service mode while update ISTAP*, select this type to repair (OBDII-CAS3+ ISTAP Version).

You need know CAS ID before continuing. You can input the CAS ID or load EEPROM for read CAS ID.

Use the known CAS ID to repair: if you have record CAS ID before update CAS flash can use this way.

Use the CAS EEPROM to repair: If can’t read CAS ID, you can use this way to repair, you need to have the CAS EEPROM dump file.

VVDI BIMTool OBDII CAS3+ ISTAP Repair

VVDI BIM TOOL Pro EEPROM Repair (CAS1, CAS2, CAS3, CAS3+)

Support loading EEPROM dump file in service model, Then automatically repair the service mode status and save the new EEPROM dump file.

Step: Load the EEPROM dump file that needs to be repaired, and it prompts that you need to load the FLASH file. If you need to repair, you will be prompted to save the new EEPROM and FLASH files. After repair, it is recommended to load the new file to see whether it needs to be repaired. If it is still prompted file need to be repaired, it means there is a problem with the file you read, please read and repair it again.

 Xhorse vvdi key tool plus works great on Toyota Corolla 2021 (4A) all keys lost via XM38.


Feedback from Mr. Samayoa.


Tools used:

VVDI Key Tool Plus

Xhorse Toyota XM38 Smart Key

Xhorse XD8ASKGL Toyota AKL Adapter 


Some images are attached:

Connect AKL adapter with keytool plus and Corolla

VVDI Key Tool Plus Toyota Corolla 2021 4A All Keys Lost 1


VVDI Key Tool Plus Toyota Corolla 2021 4A All Keys Lost 2

Generate remote using XM38 under Corolla/Levin (2019-) KeylessGo ID4A(315MHz) option

VVDI Key Tool Plus Toyota Corolla 2021 4A All Keys Lost 3

Then start to program remote
Menu path: Immo programming->Toyota->Select by type->Smart Key System->All smart remote keys lost-> 4A-(2019-)

VVDI Key Tool Plus Toyota Corolla 2021 4A All Keys Lost 4

VVDI Key Tool Plus Toyota Corolla 2021 4A All Keys Lost 5

VVDI Key Tool Plus Toyota Corolla 2021 4A All Keys Lost 6

Backup smart box eeprom data
Generate emergency key
Add key function to make a new key

VVDI Key Tool Plus Toyota Corolla 2021 4A All Keys Lost 7

VVDI Key Tool Plus Toyota Corolla 2021 4A All Keys Lost 8

VVDI Key Tool Plus Toyota Corolla 2021 4A All Keys Lost 9

VVDI Key Tool Plus Toyota Corolla 2021 4A All Keys Lost 10

Car starts fine.

 Xhorse VVDI BIMTool Pro can support reading & write ECU ISN via OBDII. This is writing a new ISN for BMW CAS3++(ISTAP) when all keys lost.


Run VVDI BIM Tool to connect CAS3 module,

Exchange ECU/CAS >> Type: CAS – CAS3+(0L15YM, 0M23S)(ISTAP) – OBDII >> Read module information

CAS3 unit info was read out.

Write BMW CAS3++ (ISTAP) ISN by VVDI BIMTool Pro  1

Write BMW CAS3++ (ISTAP) ISN by VVDI BIMTool Pro  2

To write ISN, please read ISN or load EEPROM to get ISN first.

Click “Read ECU ISN”.

  1. If you have working key, then you can get CAS ISN from working key.
  2. If all key lost, then BMWTOOL will fill new ISN.

Do you have working key? No.

Paste the new ISN to be written in “Update ISN” option, click “Update module”.

Write BMW CAS3++ (ISTAP) ISN by VVDI BIMTool Pro  3

Write BMW CAS3++ (ISTAP) ISN by VVDI BIMTool Pro 4

Write BMW CAS3++ (ISTAP) ISN by VVDI BIMTool Pro 5

Write BMW CAS3++ (ISTAP) ISN by VVDI BIMTool Pro 6

The dealer key should be taken away from ignition switch.

If key is keyless, please move it out of car.

If there’s no key in ignition, continue anyway.

Click “OK” to continue.

Reading data, please wait…

Writing data success.

Done.

Write BMW CAS3++ (ISTAP) ISN by VVDI BIMTool Pro 7

Write BMW CAS3++ (ISTAP) ISN by VVDI BIMTool Pro 8

This is how to write CAS3++ ISN with VVDI BMW Tool by OBD.

https://www.vvdishop.com/service/vvdi-bimtool-pro-write-bmw-cas3-istap-isn.html


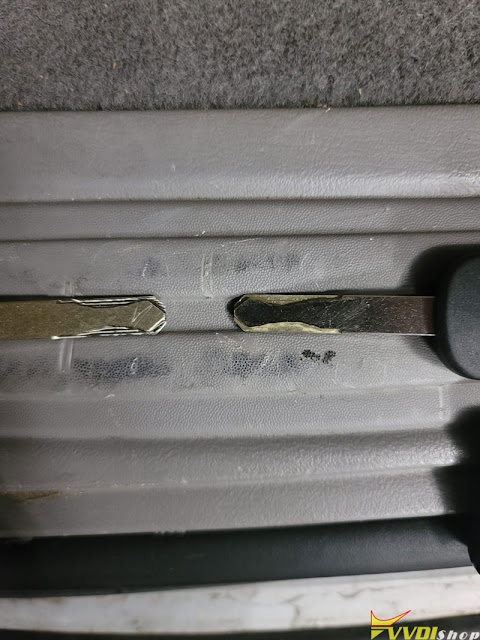
 Some people reported that they can read Honda Civic Honda high security key but could not cut the key correctly with Xhorse Dolphin or Condor key cutting machines.

Here are some useful tips on cutting these Honda high security keys.

Cut Honda Civic Keys by Xhorse Dolphin or Condor

1).

If you have the problem just remove the gas cap or glow box lock and get the code and make a whole new key just double check key image on the condor looks the same as the clients one.

2).

theres 2 options 1.41 and 1.05. tried both.
cut twice sometimes it happens.
Also make sure your buying quality keys and not junk that super hard metal to cut if so recut it twice.


3).

I got me a stone that sharpens the knifes and I slide that key a couple times and boom it fit.
Also what I usually do is use the universal cut works like a charm. I notice like every week or so I usually clean and recalibrate it also.

that’s what we have to do in uk as well. File down and they start to turn.


4).
If you aren’t using the correct web depth of 1.05 then you’ll have issues. On most of the Xhorse machines there is a 1.41 and 1.05.
I adjust each side 1.10 with the manual adjustment before it cuts each side. Honda are notorious for issues with web depth and this isn’t the only machine with it.


5).

Had that issue move to 2.5 cutter and you will have no issues the 1.5 cuts it to perfect also if the middle of key is to thick higher the depth and will work.


6).
I had the same issue with the condor, so I jumped to the dolphin x005 and and it worked perfectly. So the problem was the calibration. I don’t trace no more since the key
Reader came out. I got tired of breaking the tracer tips.

Honda keys needs to be bumped couple times in an ignition if it won’t turn..also you need a key code for machine to cut it..if you Lishi hon66 it’ll be allover the place until you see code found under Find Bittings option..use Autocode to buy code fastest and easiest way and put price per code on customer tab.


7).

Cut these keys 2 times
Also, use brush or fine file to remove the burs along the edges and also a bit of the stop
After cutting many machines do not cut enough close to the head of the key which does not allow the key to go all the way into the cylinder.

Also, the 1st time jiggle the key a bit until.it finally turns, this will seat the key into the proper position within the cylinder Usually cutting the key 2 times on each side works Especially, if your blade is a bit worn out.


8). Go thru calibrate the machine and then calibrate the m2 head and do universal key duplication.

Honda key-calibrate-calibrate and calibrate before you cut!

It is possible that you have to do a full calibration, there are many steps to follow.


9) Or use dolphin xp007 manual key cutting machine.

 Here’s the trick to programming VW Passat with Comfort Module (CCM) all keys lost by xhorse vvdi tools (VVDI2 and VVDI Key Tool Plus).

vw passat ccm key 1

1.OBD method

There is MUCH easier way to do these Passat and CC with CCM.
Simply, open fuse box cover on driver’s side
30A fuse will be hot
Put wire, preferably with switch in between 30A hot fuse and 5A fuse
This will force ignition on
Then read immo data
Make dealer key
Adapt key
Remote will need to be programmed separately.
This trick is good but only works on some ECUs. Some totally, some partially (6 bytes out of 7), some not.
This way can work only on edc16 (only some this ecu got 7 byte) rest ecu only 6 bytes and even if fits PCR2.1 you can’t get any cs by obd. So classic way is still best because the results is 100%.
2.
You can disassemble the CCM, remove the immo data eeprom and program key via dump.
For example, it can be done by xhorse vvdi key tool plus or vvdi2.
Remove glovebox, to access module. Remove and desolder chip read and make dealer key. Refit then learn to car via obd.

vw passat ccm key vvdi key tool plus 1

vw passat ccm key vvdi key tool plus 2

 Had to share some very surprising news from one of our customers!!

I was working on a flip key for a 2010 Fiat Ducato, and wasn’t able to connect through to the vehicle to program diagnostically.
About to give up, so I attempted a Remote Clone with the Xhorse VVDI mini key tool and lo and behold.. it works perfectly!!
2010 FIAT DUCATO ON A B SERIES FLIP!

Clone 2010 Fiat Ducato Remote with VVDI Mini Key Tool

Some people says usually it will work perfectly for a few minutes, when you press the original remote the one you made would stop working until you start the vehicle with it.

But i tested it over and over with both keys, everything is perfect, disconnected the body power cable and reset the lot and still works 100%.

 Xhorse VVDI2 key programmer released new software V7.3.0 on Jan. 7th, 2023.


*** 2023-01-07
*** Require firmware V7.3.0
************************************************************************

!!!This version require update firmware V7.3.0!!!

===== VAG V7.3.0 =====
1. Improvement autodetect for VAG immobilizer system
2. Bugfix

===== BMW V7.3.0 =====
1.Support make dealer key for motorcycle (Contact vvdishop.com for license)
1). Support 8A smart key via OBDII (Require XM38 motor remote)
2). Support 4D+ transponder key via OBDII (Require VVDI super chip)
2. Bugfix

===== Porsche V7.3.0 =====
1. Bugfix

===== PSA V7.3.0 =====
1. Bugfix

===== Transponder Programmer V7.3.0 =====
1. Improvement prepare remote function
2. Immobilizer data tool: Euro->Opel->IMMO-1->68HC05 bugfix
3. Bugfix

===== Copy 48 (96 bits) V7.3.0 =====
1. Bugfix

===== J2534 V7.3.0 =====
1. Bugfix

===== Online Upate Tool V7.3.0 =====
1. Bugfix

===== Quick Start V7.3.0 =====
1. Bugfix

 This is a guide on how to setup, calibrate & test, update Xhorse Condor XC-Mini Plus II key cutting machine for the first time. Read this article carefully to learn.


How to prepare Condor II?

  1. Plug in device, and power it up.
  2. Remove brands & loosen milling bolts with provided hex wrench, then insert probe into left-side clamp, cutter into right-side.
  3. Align probe and cutter at visually even height once tightened.
  4. Fully inset M5 clamp from right to left into clamp vice, secure in place.

set up Xhorse Condor II 1

set up Xhorse Condor II 2

How to setup & bind Condor II?

  1. Select preferred language, accept privacy policy and continue.
  2. Connect to WiFi
  3. Log in Xhorse account to get security code, press “OK” to bind device.

Device activation success.

set up Xhorse Condor II 3

set up Xhorse Condor II 4

How to calibrate & test Condor II?

  1. Setting >> Device calibration >> Height calibration >> Start

Tip: install M5 clamp then select A position(side A is upwards) and tighten left, don’t insert key blank.

calibrate Xhorse Condor II 1

calibrate Xhorse Condor II 2

  1. Once complete begin “Cutting Calibration”, insert HO01 test key, align with last mark, flat and secured into place before starting.

Use debris brush to remove all metal shavings from the clamp and key surfaces then continue.

calibrate Xhorse Condor II 3

  1. Clamp Deviation >> M5-A clamp, insert and align HON66 test key to fifth and final marker. Press “Start”.

When completed, move on to side-B and place key blank into the channel, sitting atop of the clamp surface before tightening.

calibrate Xhorse Condor II 4

calibrate Xhorse Condor II 5

Tip: Incorrect insertion will result in an error code and red flashing hazard to signal need of adjustment. Simply correct and continue.


  1. Begin “Motor Measurement”. Run each test once to ensure proper function and movement of all rotors, for all 4 angles off motion.

calibrate Xhorse Condor II 6


  1. In order to test the “Electrical Conductivity”, use a key blank to ground the probe or cutter to the clamp. Green circle means good connection.

calibrate Xhorse Condor II 7


How to finish settings & upgrade?

  1. Select “Cutting Setting” to see available adjustments or setup options available to make the Xhorse Condor 2 your perfect cutting machine.
  2. Go to Update and install any every time they are available to ensure perfect function.

Once updated, check out the fully-packed, ready to work Key and Vehicle Lists.

update Xhorse Condor II 1

update Xhorse Condor II 2

www.vvdishop.com

https://www.vvdishop.com/service/set-up-calibrate-and-update-xhorse-condor-ii.html


 Here’s the user feedback on VW Caddy and xhorse remote.

“Today I made a VW Caddy from 2016 successfully. Transpoder was a MQB and the dash a 24NEC32 (VDO cluster), with PIN and CS (12Hex).

It was no ID48, ID48 can be cloned. vvdi mini key tool shows Transponder MQB, not cloneable.

Used a XKB506EN Xhorse universal key, generate remote as 5K0-837-202AD, generate a super chip XT27B as MQB, made dealer key with PIN and CS using autel im508, learned immo and learned remote in 09 central electric.

I think you can also use mqb xhorse key but this is half cheaper.

Program VW Caddy 2016 Key use Xhorse XKB506EN


< 2023年01>
S M T W T F S
1 2 3 4 5 6 7
8 9 10 11 12 13 14
15 16 17 18 19 20 21
22 23 24 25 26 27 28
29 30 31        
カテゴリ
QRコード
QRCODE

アクセスカウンタ
読者登録
メールアドレスを入力して登録する事で、このブログの新着エントリーをメールでお届けいたします。解除は→こちら
現在の読者数 0人
プロフィール
jtac
jtac