Since Xhorse announced the M5 Clamp has already been compatible with old Dolphin XP005 & Condor XC-Mini Plus key cutting machine, I’m gonna have a try today. Before that, please make sure your software and firmware were upgraded to the latest version.
The M5 clamp allows users to cut high security and edge cut using the same clamp by rotating from A to B side. No more to disassemble M1 or M2 clamp again and again.
Procedure
- Installation
The first thing we need to do is to install the M5 clamp on Dolphin XP005.
.jpg)
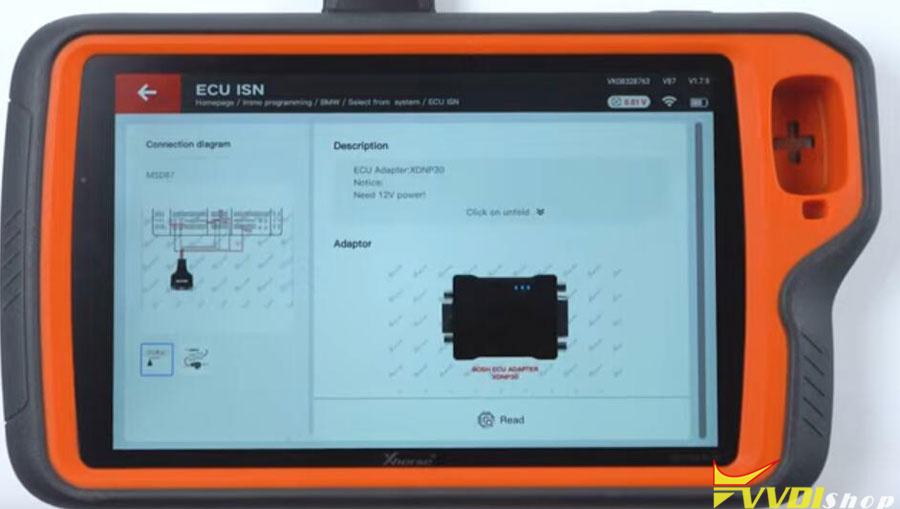
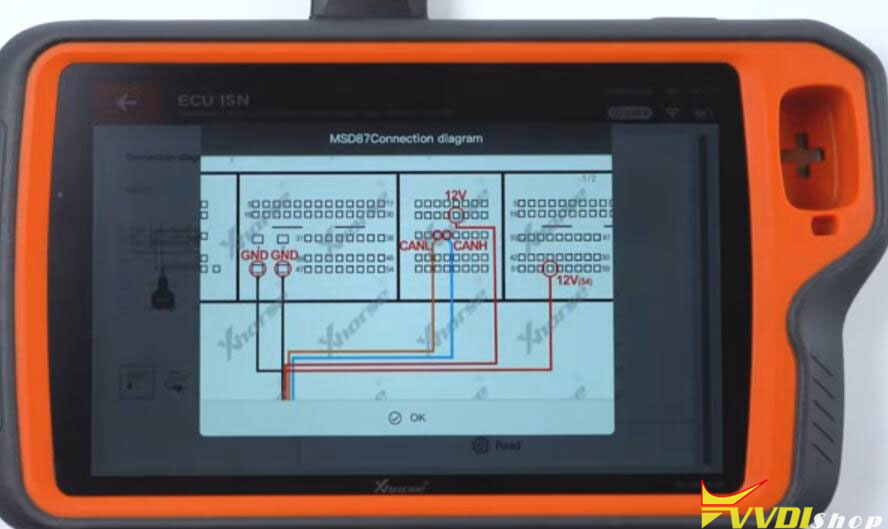
- Set Cutting Parameters
Device information >> Cutting setting >> Selected M5 clamp
.jpg)
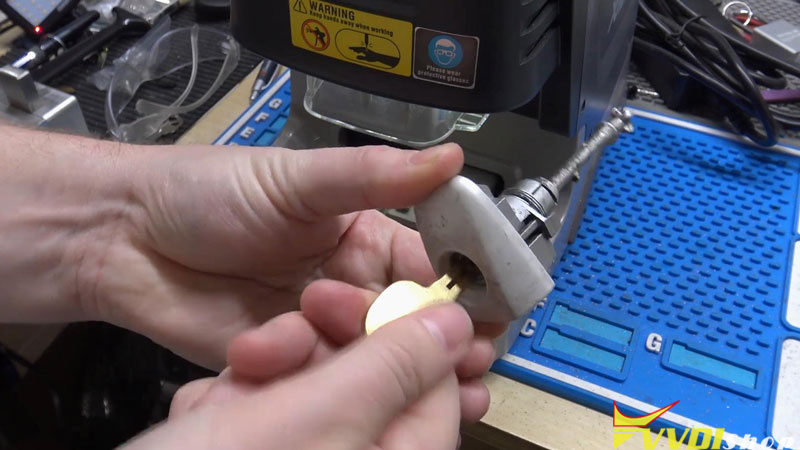
- Cut Key
All key lost >> Lexus >> Enter lock code: 44137
As we can see, it’s telling to use the M5 clamp B side, tip align Align line 2.
Rotate M5 clamp to B side, then install a key blank firmly.
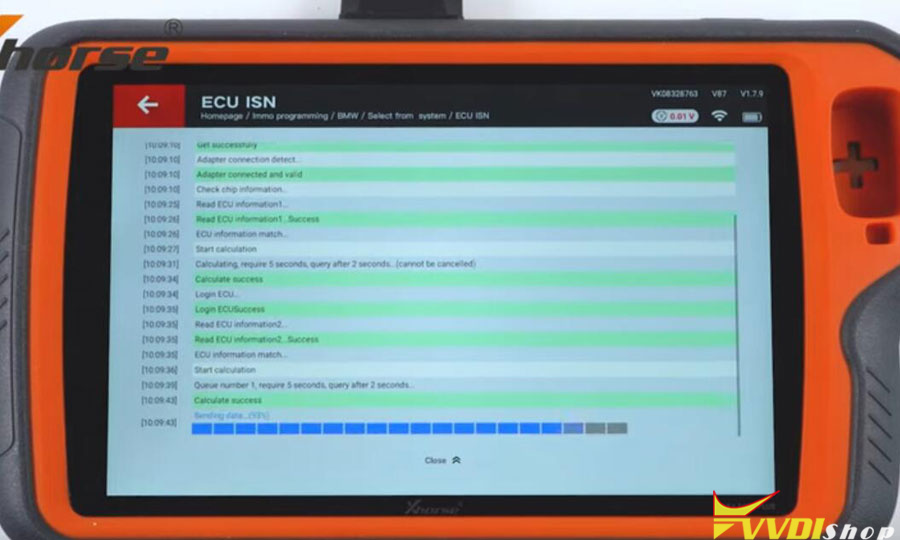
Start cutting key…
The Xhorse Dolphin can work as usual.
.jpg)
.jpg)
.jpg)
.jpg)
After successfully cutting 2-sides, take out the Lexus key for a test.
It can actually open the lock.
As expected, the Dolphin 1 can work with M5 clamp without problems! It should also perfectly do with other Xhorse Key Cutting Machines as it claimed.
.jpg)


.jpg)
.jpg)
.jpg)
.jpg)
.jpg)
.jpg)
.jpg)
.jpg)
.jpg)
.jpg)
.jpg)
.jpg)
.jpg)
.jpg)
.jpg)
.jpg)
.jpg)
.jpg)


.jpg)
.jpg)
.jpg)
.jpg)
.jpg)
.jpg)
.jpg)
.jpg)


